

I'm by no means an expert at streaming or animating or using OBS in general, but I've had a few folks ask me about the fun little Nazi shooting redeem I added to my twitch channel a few weeks back.
I set this up using streamer.bot, a tool for automating things related to your streams, and OBS, the thing that actually produces the streams. Let's go over how I did it.we had some fun with a silly little redeem i setup tonight
— Qwarq (@qwarq.io) January 26, 2025 at 2:29 AM
[image or embed]
Initial Setup
To start with, let's setup streamer.bot, which can be downloaded here. If you're only interested in the OBS animation part, skip ahead to the next section. Once you open up streamer.bot, the first thing you'll want to do is connect your twitch account. There's an intimidating number of tabs, but outside of the initial setup you likely won't need to look at more than 2 or 3 regularly.
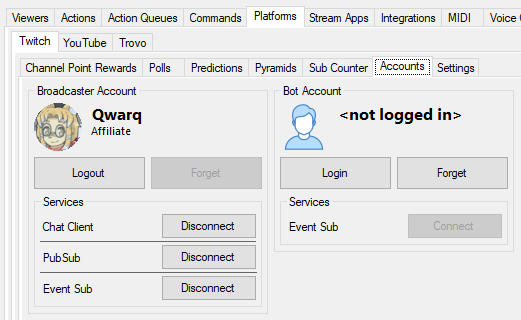
Connecting your twitch account is under the tabs: Platforms, then Twitch, then Accounts. In the Broadcaster Account section click Login and a browser will open so you can log in with twitch. Once that's done, you're connected. This will let streamer.bot see when viewers send chat messages, subscribe, redeem a channel point reward, or many other things.
Next we need to connect streamer.bot to OBS. First we need to open up OBS and enable the WebSocket server.
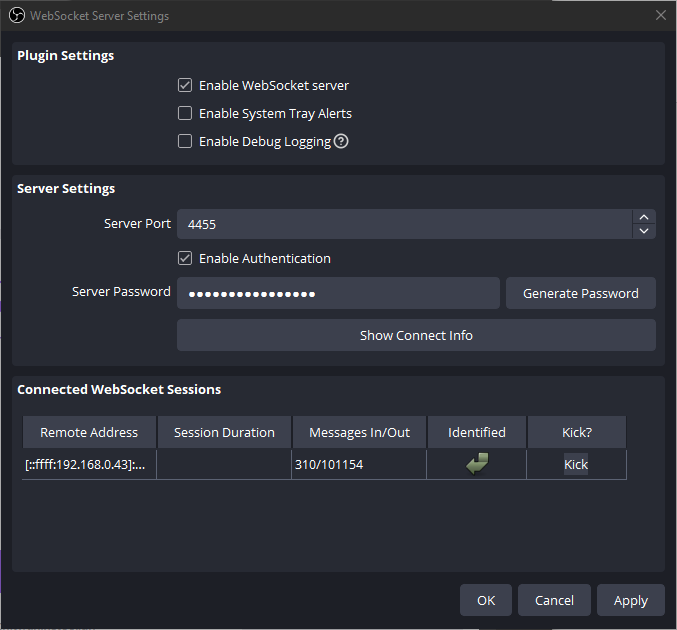
Under Tools, you'll find the WebSocket Server Settings. Just hit the Enable WebSocket server option and it'll technically be set, but you should absolutely check the Enable Authentication box and set a server password for security. Once you're done, hit the "Show Connect Info" button and make note of each field. Then hop back over to streamer.bot, click the Stream App tab and make sure you're on the OBS tab. Right click the big table and choose Add. You'll need to fill out the host, port and password from OBS and give it a name. Once that's done I suggest right clicking the new row in that table and enabling Auto Connect, since it's easy to forget to manually connect to OBS each time.
And that's all of the streamer.bot setup for now. We'll be back to setup the actual redeem, but for now we need to setup the animation itself.
Animation Basics
Instead of jumping right into the final animation, let's start with something simpler to demonstrate the basic building blocks. Let's make a new scene and plop down an image. Trans Rights Nia Xenoblade should be good.
Let's make Nia slide into frame using a show transition. Right click the source and go down to the Show Transition sub-menu. There you can choose the type of transition to add. Let's pick Slide.
When you select a transition a dialog may pop up to give you more options. For slide, we can pick which direction it'll slide in from. In this case let's do Right and hit OK. Just under the list of transitions if the duration. This lets you define how long the animation should take in milliseconds. 600ms is a good value for now.
Now that we have a show transition, try clicking the eye icon for the image off and then on again. When it's turned on, you'll see the image slide in how we defined. You probably saw that there's a Hide Transition option just below Show Transition; that does exactly what it sounds like. It applies a transition when you hide the source. Go ahead and add a slide down transition to Nia when she's hidden.
Now let's add another image into the mix. I added one of my name and put it just under Nia.
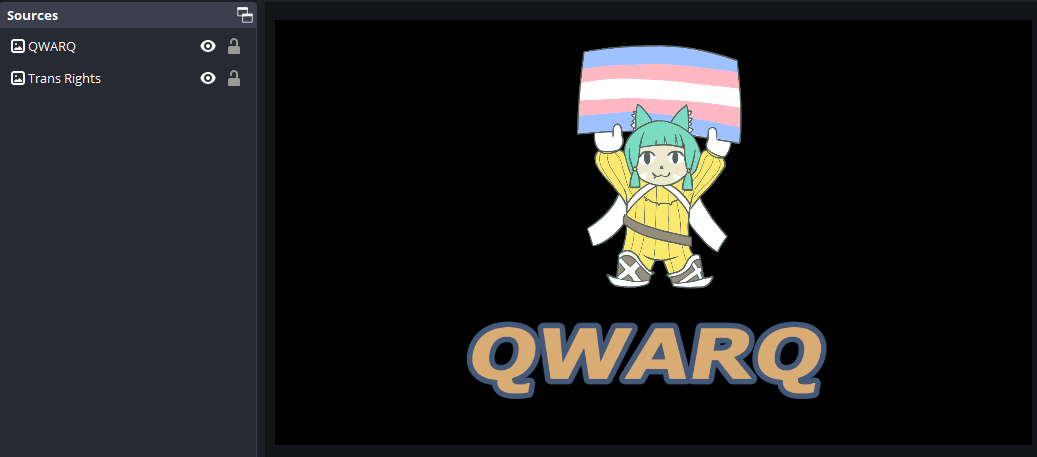
Let's add show and hide transitions to this one too. I like the look of it sliding right for both. Now if we enable and disable the sources we can get a slick little logo-like animation.
It would be nice if we could automate that toggling - and we can! We can use OBS's Move Action filters. These filters are actually incredibly powerful and let us create a whole sequence of actions, almost like a script. To get started, open up the filters menu for the scene. Right click the scene in your scene list and click filters.
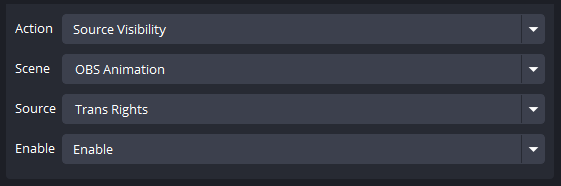
Next we can add a filter by clicking the plus button at the bottom and choosing "Move Action". This filter will be showing the Nia image, so name it appropriately and you'll be presented with a bunch of options. The most important part is the Start Action. This is what the filter does as soon as it's enabled. There are a handful of different actions we can take, but here we want Source Visibility. Selecting that opens up even more options. Select the scene the source is in, then the source itself, when choose whether to enable or disable the source - in this case we want to enabled it.
Now we can add another filter to show the other image. Same deal as the first - add a Move Action, select Source Visibility, choose the scene and source, choose enable. If you click the eye icon next to either of these filters it'll show the corresponding source. Now we can get to the interesting part: linking the filters together.
Select the filter for the Nia image to edit it and scroll all the way down in the list of options. At the end you'll see a bunch of dropdown menus that determine the sequence of filters. For out purpose we want the "Next Move" option. This lets us select a different filter that will be enabled as soon as the current one is finished. Select the second filter here and the most basic linking is done. Now if you enable the first filter, it will play the transition and then automatically enable the second filter.

Next is hiding the images. It's basically a carbon copy of the filters to show them, with the main difference being "disabled" instead of "enabled" in the source visibility options. The other difference is of course the "Next Move" values. The second show filter should have the first hide filter as its next move, and the first hide should have the second hide as the next move.
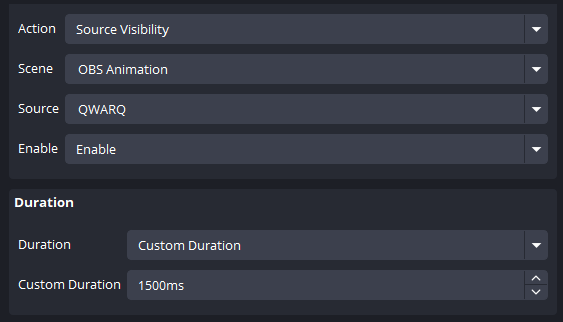
That seems to work! But there's a bit of a problem. I'd like everything to freeze for a second or two in the middle when everything is visible, then slide out. There are a few ways to fix this, but the simplest is to just extend the duration of the second show filter. Select the filter and look for the Custom Duration option and set it to something like 1500ms - just enough time to take it all in.
And that's just about it. This is 90% of what's needed to understand the Nazi shooting animation. Now let's take a closer look at my setup.
Finally shooting a Nazi
The whole animation is just a sequence of showing sources, waiting and hiding sources. First, let's outline the goal.
There's a high level overview of what we're trying to do:
- Show the Nazi and the dead Nazi count
- Raise the gun
- Play the firing animation and play the gun fire sound.
- Play the Nazi dying animation and lower the gun
- Hide dead Nazi and Nazi count
If you'd like to follow along and create the animation yourself, you can download all the images and sounds I used here.
We've got a source for each of the important bits:
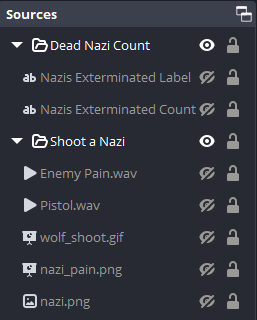
And here are the filters to drive them:
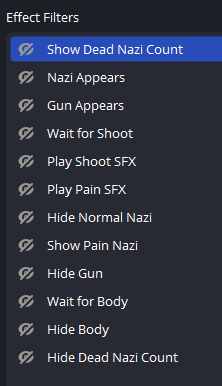
Let's start at the beginning. The Show Dead Nazi Count filter enables the Dead Nazi Count group. Since there's a label and value for the count, I put them into a group so they can be enabled and disabled all at once. Most things that work on individual sources will work with groups as well, including Show and Hide transitions. The group slides up on show and slides down on hide. When it's done it enables the Nazi Appears filter.
The Nazi Appears filter is very straightforward. It just enables the nazi.png source, which is set to fade when shown/hidden. Its next move is Gun Appears.
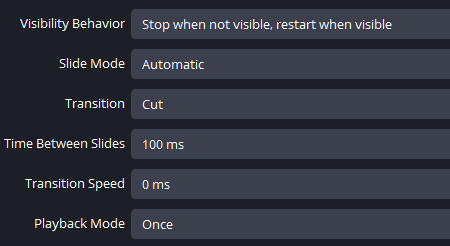
The Gun Appears filter itself is very simple in that it just enables wolf_shoot.gif, but if you look at that source you'll notice it actually has a slideshow icon - it's not actually a gif. While a gif might work for this, a slideshow offers a bit more control over how it behaves.
I extracted each frame of the firing animation and put them into the list of image files for the slideshow and set the transition speed to 0ms. This makes the frames change instantly. I also changed the time between slides to 100ms, effectively creating a 10fps animated sprite. The playback mode is also set to Once as, so that once it finishes playing it won't loop. Finally, setting its visibility behavior to stop and restart will ensure its always in the right state when the animation starts.
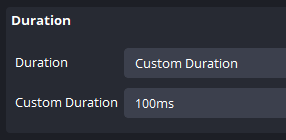
One last detail is that, in order to cause the animation to wait a moment, so it has time to slide in before firing, I duplicated the first frame 6 times. As with many of the timings here, the number of duplicates can be adjusted based on how long you want to wait.
Next is Wait for Shoot. This one is where some new tech comes into play. The End Action section is like the Start Action we've been using, except it take effect when the filter ends. Here it's used to effectively trigger 2 subsequent filters at the same time, when combined with the Next Move option we've been using.
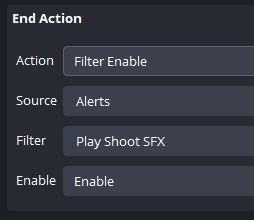

This filter doesn't actually take any sort of action. It's only here to create a delay that ensures the firing sound effect lines up with the animation. The End Action enables the Play Shoot SFX filter and the Next Move enabled Hide Normal Nazi to begin the Nazi dying animation.
At this point there are things happening concurrently, so let's focus on the SFX stuff. Play Shoot SFX (the gun fire sound) gets enabled and moves on to Play Pain SFX (the Nazi yell). These enable their corresponding audio sources which are set to restart playback when the source becomes active. This means that they play from the start as soon as they're enabled, so they play in sequence. They both use their End Action to disable themselves once they're finished, and Play Pain SFX doesn't enable any other filters. This will play the shoot sound, the yell and then reset the sources to their original state.
The other branch of the concurrent filters is with Hide Normal Nazi. This disables the standing Nazi image and immediately switched to Show Pain Nazi, which enables the dying Nazi slideshow. This slideshow is very similar to the shooting slideshow, just with a slightly longer time between slides (150ms) and no duplicated frames.
Now that our Nazi is good and dead, we can start cleaning up. Once the dying animation starts, it switches to Hide Gun, which does what it says on the tin. Then it switches to Wait For Body, which just waits 600ms so that the viewer has a moment to take in the fresh kill before it fades out. After the wait it goes on to Hide Body, which disables the dead Nazi. Finally, the dead Nazi count is disabled and we're done!
There's the final product with a look at the guts as it's running. It might look a bit intimidating at first, but when you dig down it's just some sources being enabled and disabled in sequence. There are far more complex animation options that I didn't even tough on here, such as "Move Source" filters, as opposed to the "Move Action"s we've been using, which allow moving sources around the scene, among other things. If this post has interested you at all, I definitely suggest experimenting with Move Source filters and checking out the other actions available with Move Action.
Connecting it to Streamer.bot
So we have a nice little Nazi shooting animation that we can start by enabling the first filter in the sequence. If we want this to be a twitch redeem it would be much easier to have streamer.bot trigger it for us. This is pretty simple, thankfully.
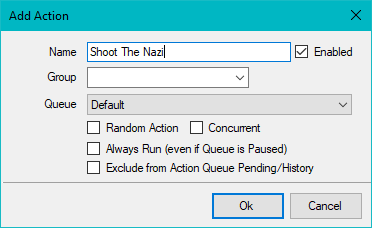
First we need to create an action to represent the redeem. On the Actions tab of streamer.bot, right click the big table, choose Add, and enter a name. Don't worry about any of the other options for now.
Now select your new action. Each action has 2 parts: triggers and sub-actions. Triggers define when you want the action to take effect and the sub-actions is what to actually do. Right click in the Triggers area and you'll get a menu with a whole bunch of options. If we're working with twitch channel point redeems, the option we want is Twitch -> Channel Reward -> Reward Redemption. Select that and it'll ask you to select a channel point reward on your twitch account. If you don't have one setup for this yet, you can hit the Create Reward button and make one right there.
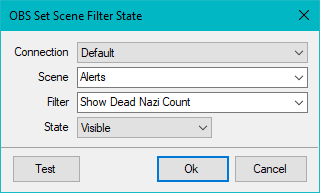
With the trigger setup, only the sub-action is needed now. Right click this section and navigate to OBS -> Scenes -> Set Scene Filter State. Choose the scene the animation exists in as well as the first filter in the sequence and make sure the visibility is set to "Visible".
That's the absolute basics for triggering the animation. If you right click on your trigger you can select "Test Trigger", which will simulate a redemption so you can make sure it's working as you want.
Keeping Count
At this point everything should be setup... except for once thing. The Nazis Exterminated count doesn't actually show a value. To do this we need to dig into some more streamer.bot functionality.
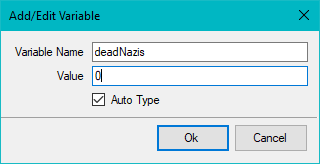
First we'll need to create a variable. A variable is basically a persistent value that can be updated and referenced in sub-actions. Hit the big Variables button on the top row of buttons in streamer.bot. Right click the table and click Add Variable. Name it anything sensible, give it an initial value of 0, and check the "Auto Type" box so streamer.bot will properly treat it as a number.
We'll be increasing the value of this variable by 1 every time the animation is redeemed. There's a sub-action specifically for this under Core -> Globals -> Global (Set). Enter the name of your variable, switch the dropdown to "increment" and enter a value of 1.

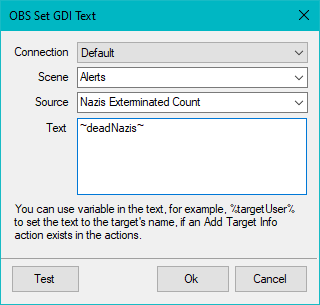
Now every time you test the trigger, the value of the variable increases by 1. Finally, we need to use the variable's value to set the source's text in OBS. There's a sub-action for this too! It's found under OBS -> Sources -> Set GDI Text. You just need to select your text source for the dead Nazi count and use a bit of special syntax to tell streamer.bot that you want to use the value of the global variable. Just put the name of the variable between tildes (e.g. ~deadNazis~).
And with that, everything should be up and running. Every time you test the trigger, the count should increase by 1 and the animation should play. As you probably saw when looking through sub-action and trigger options, you can do a massive amount of stuff with streamer.bot, even writing actual C# code if you want to get really fancy. If you managed to read through this entire thing, then I hope you've got a better idea of just what's possible with these tools and maybe even sparked a bit of creativity.
the guestbook!


